For those wondering why it’s so bloody difficult to boot from a thumb drive with Windows 8 or Windows 10.
One reason: Microsoft is trying to protect you from yourself.
That said, a caveat is in order. The following procedures are documented from testing with an ASUS Model X200M (laptop) running Windows 8.1. Your BIOS screen may differ as may the keys required to access the BIOS and the boot menu.
Park the USB
Since the procedures involve restarting the computer and pressing keys to intercept the automagic boot from the hard drive, it is best to prepare by inserting your bootable thumb drive in an available USB port ahead of time, rather than scrambling to plug it in during the boot process.
As Needed
The following procedure is conditional, based on the current settings for the two specified options. Once these changes are made in the bios, they will be retained until such time as they are again changed, whether deliberately, by accident, or through failure of the battery supplying charge to the CMOS. If you have already made these changes, move to the next section, “Every Time”.
- From powered down state, turn on the power OR, if already in Windows, choose Shut Down, Restart.
- Then immediately press and hold the F2 key or Del(ete) key (to enter the BIOS settings), until the BIOS settings page appears (then release).
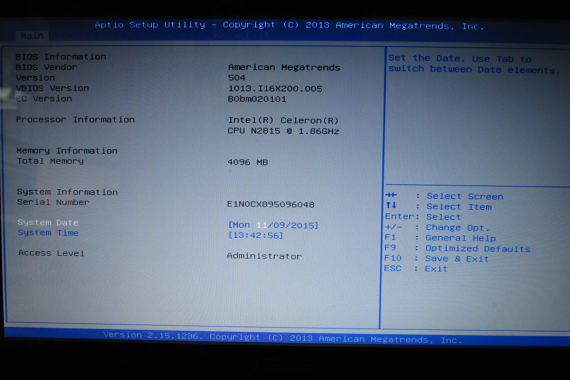
- On the BIOS settings page, go to the Boot tab (press right-arrow key twice).
- From the Boot tab, under Boot Configuration, check to see if Fast Boot is Enabled.
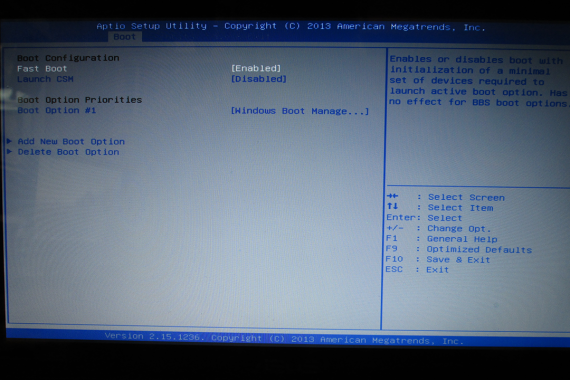
- If Fast Boot is Enabled, press the Enter key, to access the Fast Boot menu.
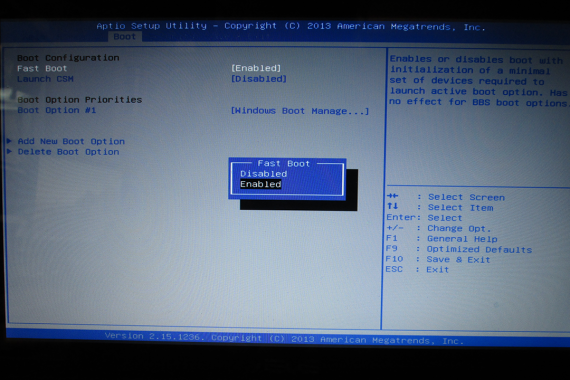
- Choose Disabled from the Fast Boot menu (press up- or down-arrow key).
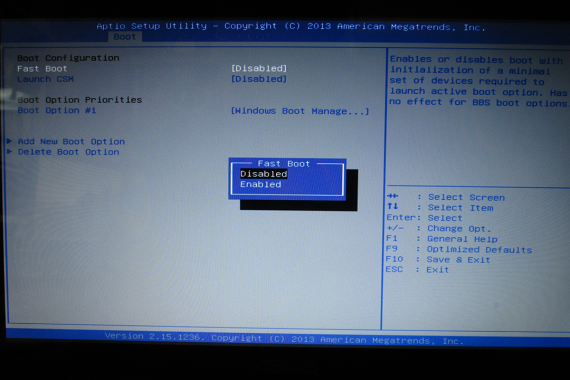
- Press the Enter key to exit the Fast Boot menu.
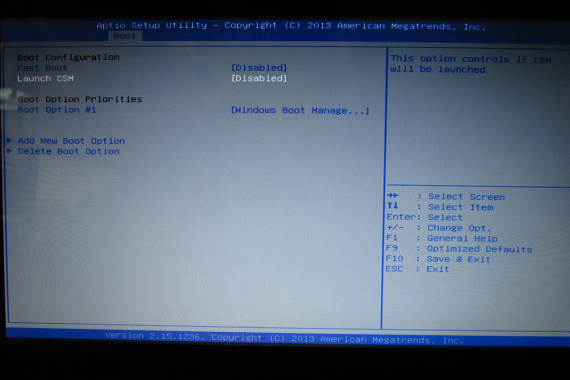
- Check the setting for Launch CSM.
If it is already set to Enabled, you should not be able to see the Fast Boot option at all — skip to step 13. - If it is set to Disabled…

- Press the Enter key, to access the Launch CSM menu.
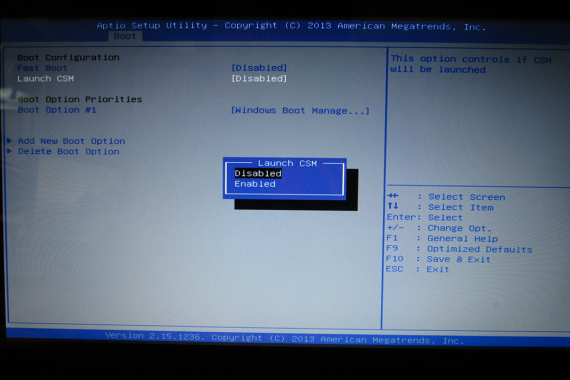
- Choose the setting Enabled from the Launch CSM menu (up- or down-arrow key).
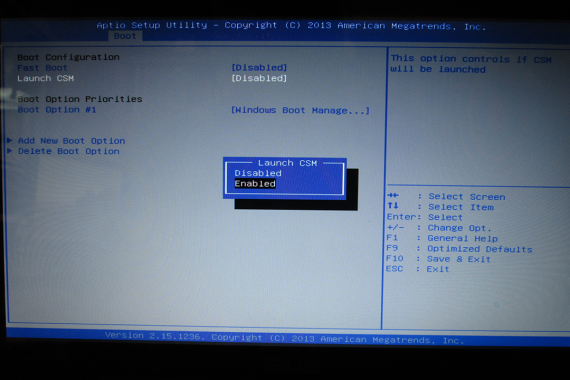
- Press the Enter key to exit the Launch CSM menu.
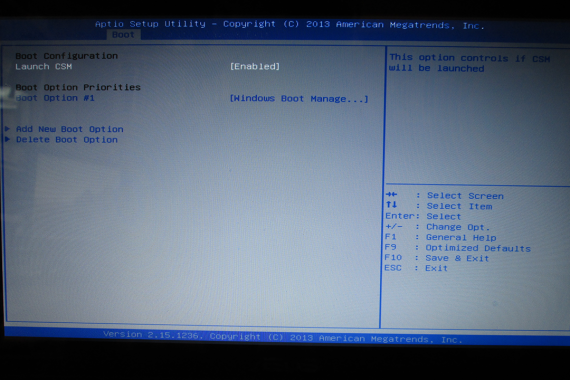
- Go to the Security tab (press right-arrow key once).
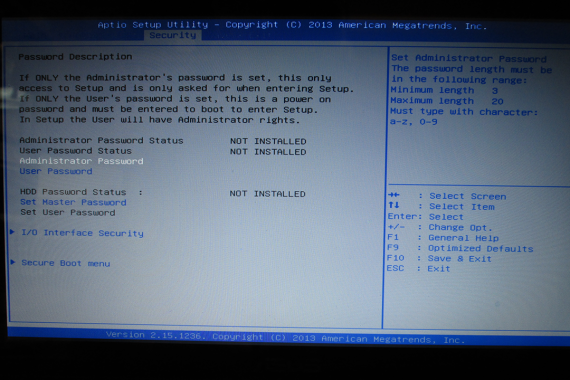
- On the Security tab, at the bottom, choose Secure Boot Menu (press up-arrow key once).
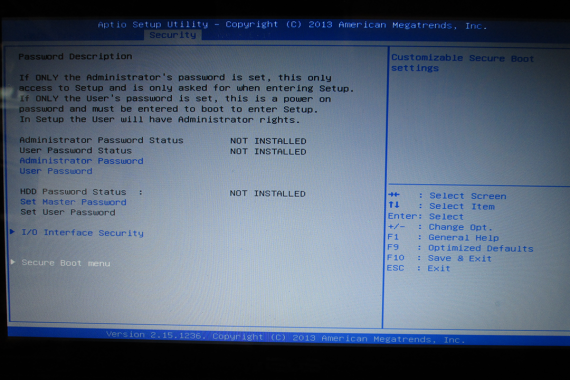
- Press the Enter key to access the Secure Boot settings page.
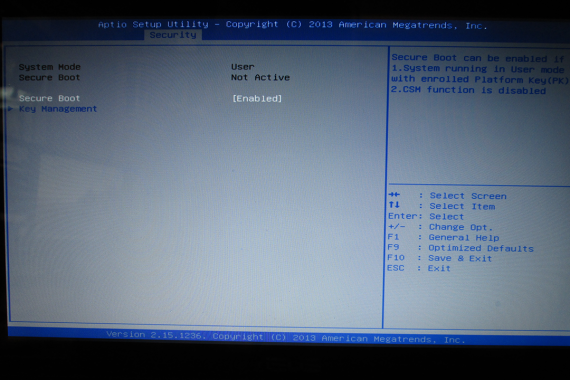
- If it is set to Enabled, press the Enter key to access the Secure Boot menu, otherwise skip to step 19.
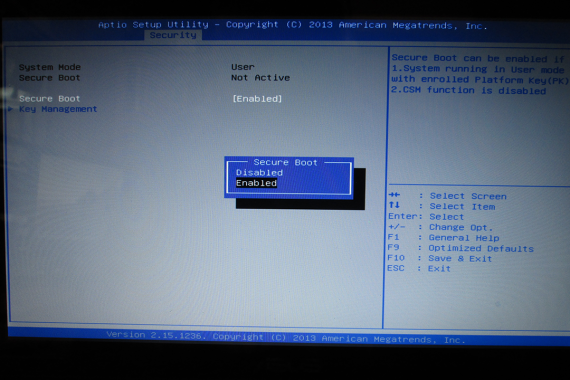
- Choose the setting Disabled from the Secure Boot menu (up- or down-arrow key).
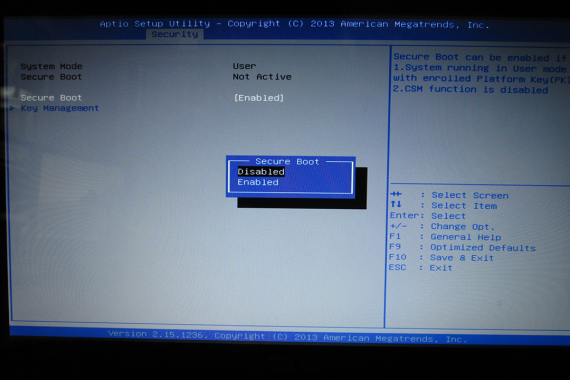
- Press the Enter key to exit the Secure Boot menu.
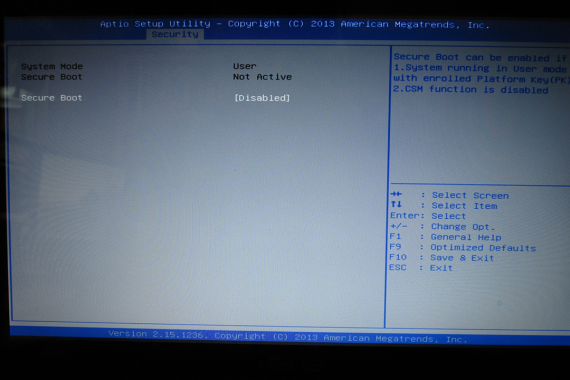
- If you changed any settings, press the F10 key to access the Save and Exit Setup prompt, otherwise, skip to step 21.
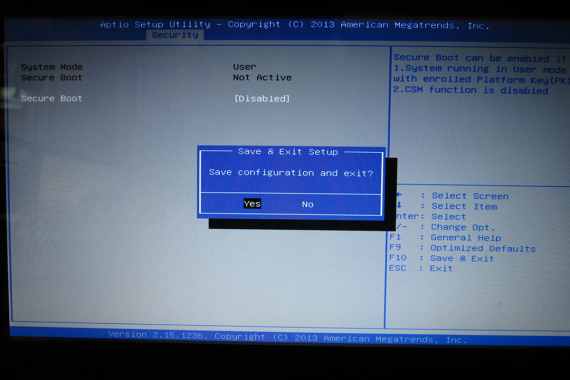
- Then press the Enter key, to save changes and exit the BIOS setup, then skip to step 24.
- Presuming no changes, press the Esc key, which takes you back to the main BIOS menu.
- Press the Esc key, again, to access the Exit Without Saving prompt.
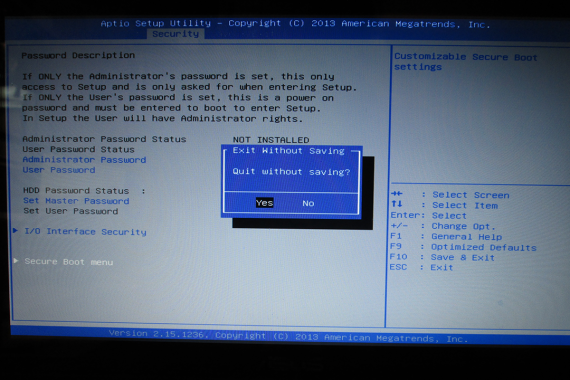
- Press the Enter key, to exit without saving changes.
- Press and hold the Esc key, as the computer restarts, to access the Boot menu. However, see the NOTE, below.
Every Time
The second part is performed each time booting from USB drive.
Presuming that you have performed the one-time procedure above, and Launch CSM has already been set to Enabled, and Secure Boot has already been set to Disabled, and that your bootable USB flash drive is already inserted in an available USB port, on power up or restart, press and hold the Esc key to access the Boot menu.
NOTE: Sometimes, on a restart, particularly from the BIOS settings, the computer will ignore the pressed Esc key and boot into Windows anyway, in which case, release the Esc key, choose shut-down, restart, and try it again, pressing the Esc key as soon as the blue Restarting screen appears and hold it down until the boot menu appears.
When presented with the Boot menu (Please select boot device:), you will typically see two entries indicating your USB bootable drive, one prefaced with UEFI:. Choose the other one, and press the Enter key.
And Bob’s your uncle.
